Raspbian Mounts External Drive as Read Only
I enjoy working with computers, and I find the Raspberry Pi to be a fascinating little device to work on.
The SD card that boots and runs your Raspberry Pi is likely very pocket-sized, offer only a few GBs worth of space. This tin be filled very quickly. The start upgrade to a Raspberry Pi is usually calculation a USB hard drive. This guide will go through permanently mounting a USB NTFS formatted hard drive to your Raspberry Pi.
This guide assumes you already have a Raspberry Pi upwards and running with Rasbian as the operating system. If you're non up to this point yet, you will have to read upward on how to set upwardly a Raspberry Pi.
Your New Best Friend: A Hard disk Drive
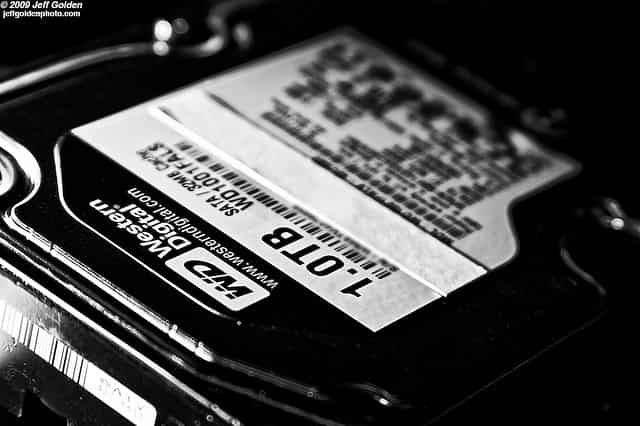
Creative Commons (CC BY-SA 2.0) Used Unaltered.
Jeff Golden on Flickr.com
Equipment
The ingredients here are elementary. You will need:
- A Raspberry Pi. Ours has Rasbian installed as the operating system.
- A mode to communicate with the Raspberry Pi, such as straight connecting a keyboard, mouse, and monitor or going "headless" and connecting with some other computer.
- A USB difficult drive
For the hard bulldoze, we chose a Seagate 4TB External, available for $139.99 at Amazon.com. This setup has some pros and cons.
Pros
- 4TB is rather big.
- The hard drive uses an external power source. Therefore, it doesn't drain power from the Raspberry Pi's USB port.
Cons
- It'due south pricey at $139.99.
- Considering information technology uses an external power source, information technology requires another cable and another outlet.
Another option is the WD 1TB Portable Drive, also available from Amazon.com. This comes at a nicer price point, only $69.99. The drive is large enough (1TB) to see all immediate needs and doesn't crave an external power source.
The Code
If yous have feel with Linux and BASH, here is the code you will need to use. If this looks disruptive or intimidating, proceed reading! We volition suspension down each and every line of code and command used. Past the end of the tutorial, y'all'll exist able to come back upward to this point, read the code, and congratulate yourself for knowing exactly what each command is doing.
Let'southward get started!
#For anybody well versed in Linux and BASH, hither'southward everything up front #Find the drive (in our instance /dev/sda1) sudo fdisk -fifty #install NTFS-3g sudo apt-get install ntfs-3g #Brand the mountain directory and manage it's possessor sudo mkdir /media/pidrive sudo chown pi:pi /media/pidrive #Mount the drive sudo mount -t ntfs-3g -o uid-pi,gid-pi /dev/sda1 /media/pidrive #Now you're done but it'southward not permanent #Making it permanent #Edit file system table sudo nano /etc/fstab #Add this line of text later the SD carte du jour partitions /dev/sda1 /media/pidrive ntfs-3g uid=pi,gid=pi 0 0 #hit ctrl-o to save and ctrl-ten to go out nano #Now the mounting volition exist restored on reboot #Reboot to test it sudo shutdown -r now Pace i: Connecting and Finding the Drive
First thing's first: boot up your Raspberry Pi and log in. Plug in the USB hard drive into a USB port on the Raspberry Pi and plug in the power source for the bulldoze if it requires one.
Now let'due south see if the Raspberry Pi "knows" about the new hard drive you've connected to it. Open up the terminal window. If you're in a desktop style screen, click on the menu at the bottom left of the screen, navigate to "Accessories" and so click on "LXTerminal."
Now type:
sudo fdisk -fifty #You should see something like this Disk /dev/mmcblk0: 4110 MB, 4110417920 bytes 4 heads, 16 sectors/track, 125440 cylinders, total 8028160 sectors Units = sectors of 1 * 512 = 512 bytes Sector size (logical/physical): 512 bytes / 512 bytes I/O size (minimum/optimal): 512 bytes / 512 bytes Disk identifier: 0x000b5098 Device Kick Start End Blocks Id System /dev/mmcblk0p1 8192 122879 57344 c W95 FAT32 (LBA) /dev/mmcblk0p2 122880 8028159 3952640 83 Linux Annotation: sector size is 4096 (not 512) Disk /dev/sda: 4000.eight GB, 4000787025920 bytes 255 heads, 63 sectors/runway, 60800 cylinders, total 976754645 sectors Units = sectors of 1 * 4096 = 4096 bytes Sector size (logical/physical): 4096 bytes / 4096 bytes I/O size (minimum/optimal): 4096 bytes / 4096 bytes Disk identifier: 0x90a334b0 Device Kicking Kickoff Terminate Blocks Id System /dev/sda1 * 2048 976754644 3907010388 7 HPFS/NTFS/exFAT Code Breakdown
- "sudo"— This substantially means "Run as Ambassador." We'll be using this a lot.
- "fdisk" — This is curt for "Fixed Deejay" and is a command line utility built into the operating system that allows yous to manage partitions on a hard bulldoze. Right now we're using it to look at what partitions on what hard drives your Raspberry Pi knows nigh by using "-I."
- "-l" — This is a "listing" command that is passed to the fdisk utility. It tells fdisk to list what it knows.
Looking through the list outputted we see, from top to lesser.
- "Disk /dev/mmcblk0 4110MB"
This is the SD menu which the Raspberry Pi boots off of. It has two partitions:
- "/dev/mmcblk0p1" and "/dev/mmcblk0p2"
Neither of these are what we're interested in. The drive that we're interested in is the 4TB Seagate External.
That drive is listed as:
- "Disk /dev/sda 4000.0 GB"
And has one partition:
- "/dev/sda1"
Retrieve that. "/dev/sda1" That is the name that the drive is going by and the name we'll use to mount it.
Pace 2: Loading the Correct Drivers
We plant the bulldoze and the Raspberry Pi knows well-nigh it, so we're done correct? Not quite. The Raspberry Pi knows about the bulldoze, but it isn't accessible all the same. You wouldn't exist able to find the drive anywhere in the filesystem. To solve this issue, we need to mountain the drive.
First, we demand to download the software that will handle talking to the drive. Drives come in different filesystem formats. The drive you have, if it's newly bought, has ever been used, or will ever be used on a Windows PC, is almost likely formatted as NTFS. NTFS is corking for Windows but isn't native in Linux, which means Linux doesn't like to communicate with NTFS drives. This is easy enough to fix. Brand sure your Raspberry Pi is connected to the internet, open the terminal window, and type:
sudo apt-go install ntfs-3g Lawmaking Breakdown
- "apt-go" — "apt" is short for "Advanced Packaging Tool" and "apt-go" is some other command line utility. It allows you to catch software packages online and install them onto the local reckoner.
- "install" — This is the keyword we pass to "apt-get" so that it knows that we desire it to install something.
- "ntfs-3g" — This is the something we want installed. "ntfs-3g" is a read-write driver for NTFS, which means it enables communication between Linux and NTFS formatted drives.
Step 3: Creating a Mountain Point
Now we demand a place in the filesystem to mount the drive to, so let's create that.
The next two lines of lawmaking will create the file location and then change the user that "owns" that location.
#Type this line and then press enter sudo mkdir /media/pidrive #Then blazon this line and press enter sudo chown pi:pi /media/pidrive Code Breakdown
For the get-go line of code:
- "mkdir" — This is short for "Make Directory." Information technology creates a folder in the filesystem.
- "/media/pidrive" — This is the folder you want to create. The Linux convention is to mount USB continued devices in the "Media" folder. The folder I want to use to access the USB drive I'k calling "pidrive." You can phone call yours any you want.
For the second line of code:
- "chown" — This is short for "Change Owner."
- "pi:pi" — This is choosing the owner:group for the folder. If you're using the Raspberry Pi, the default user is "pi." The default user grouping is also "pi." Thus, user:group becomes pi:pi.
- "/media/pidrive" — This is the folder we desire to change ownership of.
We change buying of the folder so that y'all don't need "sudo" or root permission to utilize the difficult drive.
Step 4: Getting the Bulldoze Mounted Temporarily
Okay, let's go mounting!
Remember the hard bulldoze location? In our example, it was "/dev/sda1." In the concluding type the post-obit code:
sudo mount -t ntfs-3g -o uid=pi,gid=pi /dev/sda1 /media/pidrive Code Breakdown
- "mountain" — Mount is an operating system action that will mountain the drive to the filesystem.
- "-t ntsf-3g" — "-t" is the filesystem type flag and "ntfs-3g" is telling the mountain control what filesystem to use.
- "-o uid=po,gid=pi" — This is setting the possessor of the drive. "uid" is user ID and "gid" is group ID. This is exactly like the buying settings we put on the mount signal folder.
- "/dev/sda1" — This is the reference to the difficult drive itself.
- "/media/pidrive" — Is the reference to the mount bespeak folder.
Congratulations! Now your hard drive is mounted to the filesystem, accessible, and ready to utilise! However, this approach has one downside. Every time you reboot the Raspberry Pi, yous'll have to execute this line of code again. Now we're lazy and don't want to do that, so let's prepare this mount point permanently!
Stride five: Getting the Bulldoze Mounted Permanently!
To get this drive to mount itself every time the Raspberry Pi is rebooted, we have to edit a configuration file on the Raspberry Pi called fstab short for "File System Tabular array." Now, this sounds a lot more complex than it really is. Fstab is only a text file that tells the Raspberry Pi what to do with the difficult drives connected to information technology. To edit it, we're going to use a text editor that comes with the Rasbian Operating System and works in the concluding chosen Nano.
In the final type in this lawmaking:
sudo nano /etc/fstab #You will see something similar this proc /proc proc defaults 0 0 /dev/mmcblk0p1 /kick vfat defaults 0 ii /dev/mmcblk0p2 / ext4 defaults,noatime 0 1 /dev/sda1 /media/pidrive ntfs-3g uid=pi,gid=pi 0 one #A swapfile is not a swap partition, so no using swapon|off from here on, use dphys-swapfile swap[on|off] for that The terminal window will expect different. We are now in the text editor Nano and are ready to edit this file.
Press the downwardly arrow to navigate to one line below the line that says "/dev/mmcblk0ps" and press enter to insert a new line.
Arrow upward i to identify your cursor on the new line and blazon in:
/dev/sda1 /media/pidrive ntfs-3g uid=pi,gid=pi 0 i #And then that your window now looks like this proc /proc proc defaults 0 0 /dev/mmcblk0p1 /boot vfat defaults 0 two /dev/mmcblk0p2 / ext4 defaults,noatime 0 ane /dev/sda1 /media/pidrive ntfs-3g uid=pi,gid=pi 0 1 # a swapfile is non a bandy sectionalization, so no using swapon|off from here on, use dphys-swapfile swap[on|off] for that This code should expect familiar since it's very similar to the mountain control we used to manually mount the drive.
At present press Ctrl+O (not Ctrl+Shift+O) to salvage the file. Press Enter to acknowledge the file name so press Ctrl+X to leave Nano.
Now the concluding should return to the way it originally looked.
Congratulations! You're done! Your USB hard drive is now permanently mounted to the Raspberry Pi and will be remounted on every reboot. Now you're ready to use the USB drive to store your files, music, documents, videos, solutions to all the earth'due south problems, and whatever else you desire on your Raspberry Pi!
PiDrive Set up to Gyre
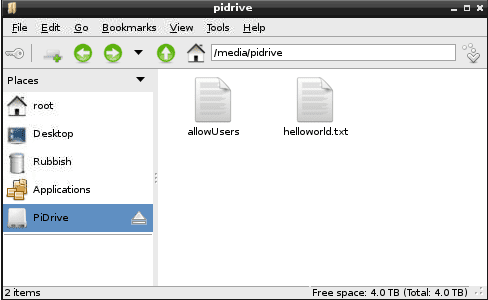
Creative Commons (CC BY ii.0)
Original Content
Driblet Me a Line
Please permit me know if this guide has been helpful to yous. Accept the poll below and go out a comment! Thank you for listening.
Happy Computing!
Give me feedback!
This article is accurate and true to the best of the author's noesis. Content is for informational or amusement purposes only and does not substitute for personal counsel or professional communication in concern, fiscal, legal, or technical matters.
© 2014 John Himics
Mahesh on June 08, 2020:
Thanks for the very useful post.
Dr James Langtry on December 10, 2018:
Learned a lot from this...
Thank-you John.
Winston on Dec 22, 2017:
This was a great help! Give thanks yous then much:D
Ho on Apr 06, 2016:
how-do-you-do,
I accept a problem, "sudo chown pi:pi /media/pidrive" doesn't piece of work he says pi:pi invalid user. can you help me?
Raspbian Mounts External Drive as Read Only
Source: https://turbofuture.com/computers/Permanently-Mounting-a-USB-Harddrive-to-your-Raspberry-Pi
0 Response to "Raspbian Mounts External Drive as Read Only"
Post a Comment